iPad Overview
Your iPad comes with a paper handout from Apple in the box. Apple’s full iPad User Guide is online at support.apple.com This guide that you are reading has some of the same information but in a simpler format. It also includes additional information that you may find helpful. NOTE: If you see words or terminology in this iPad Orientation Guide that you do not know, please see the last page with a list of iPad Word Definitions.
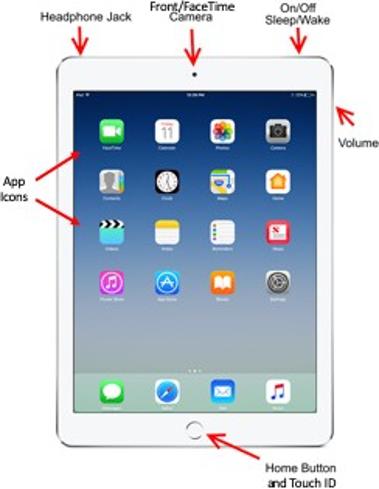
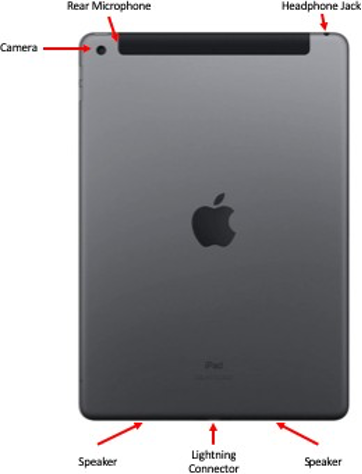
Buttons/Ports:
Here is a nice 35-minute video overview of some iPad basics on YouTube: https://bit.ly/iPad-Basics
How to set up your iPad
- Turn On: Press and hold the iPad’s power button until you see the Apple logo.
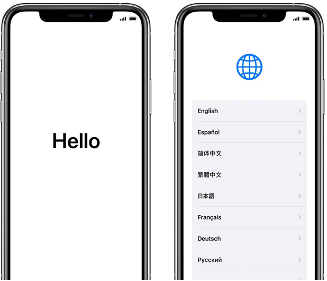
- Next: You will see “Hello” in many languages. Follow the steps on the screen to get started. (If you are blind or have low vision, you can turn on VoiceOver or Zoom from the Hello screen.) When asked, choose your language. Then tap your country (US). This affects how information looks, including date, time, contacts, and more. Next, tap the blue accessibility button to set up Accessibility Options that can help improve your setup experience and the use of your new iPad.
Tap “Set Up Manually” down at the bottom of the screen to continue
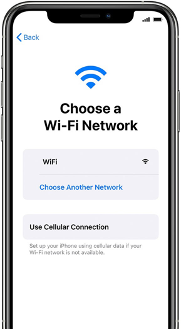
3. Activate: You need to connect to a Wi-Fi network, cellular network, or iTunes to activate and continue setting up your device. Tap the Wi-Fi network that you want to use or select a different option.
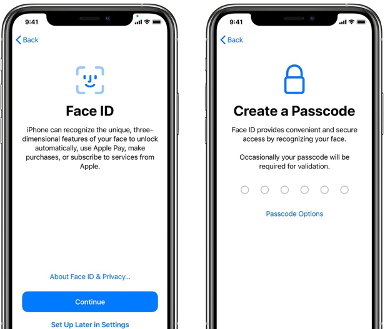
4. Set up Touch ID: With this feature, you can use your fingerprint to unlock your device and make purchases. Tap Continue and follow the instructions, or tap “Set Up Later in Settings.”
5. Create a Passcode: Set a six-digit passcode to help protect your data. You need a passcode to use features like Touch ID and Apple Pay. If you’d like a four-digit passcode, custom passcode, or no passcode, tap “Passcode Options.”
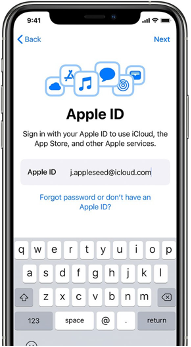
6. Sign in with your Apple ID: Enter your Apple ID and password, or tap “Forgot password or don’t have an Apple ID?” From there, you can recover your Apple ID or password, create an Apple ID, or set it up later. If you use more than one Apple ID, tap “Use different Apple IDs for iCloud and iTunes?” When you sign in with your Apple ID, you might be prompted for a verification code from your previous device.
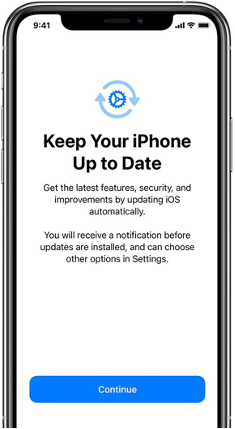
7. Turn on automatic updates and set up other features: On the next screens, you can decide whether to share information with app developers and allow iOS to update automatically.
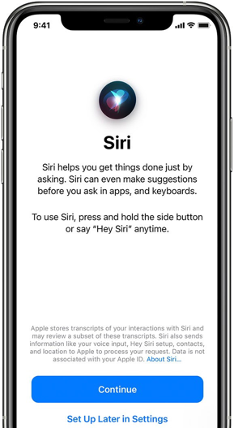
8. Set up Siri and other services: You will be asked to set up or enable services and features, like Siri. You will be asked to speak a few phrases so that Siri can get to know your voice. If you signed in with your Apple ID and would like to set up optional Apple Pay and iCloud Keychain, follow those steps on the iPad.
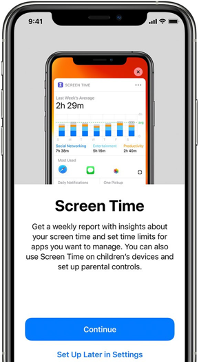
9. Set up Screen Time and more display options: Screen Time gives you insight into how much time you and/or your kids spend on your devices. It also lets you set time limits for daily app use. After you set up Screen Time, you can use Display Zoom to adjust the size of icons and text on your Home screen.
10. Finish up: Tap “Get Started” to begin using your iPad. Make a safe copy of your data by backing up, and learn about more features in the user guide that came in your iPad box.
11. Charge iPad: When the battery icon gets low, plug in your charger. You know the iPad is charging when the battery icon has a ‘lightning bolt’ in it.
12. Turn off iPad: Press and hold the On/Off/Sleep button at the upper-right corner of the iPad. Keep holding the button until a slider appears on the screen. Move the Slide to power off slider all the way to the right.
Remember, this information and more is on our Digital Inclusion webpage: cv-atlab.org/Digital-Inclusion.
iPad Settings
The Settings app is on the Home screen. It contains menus that do many things:
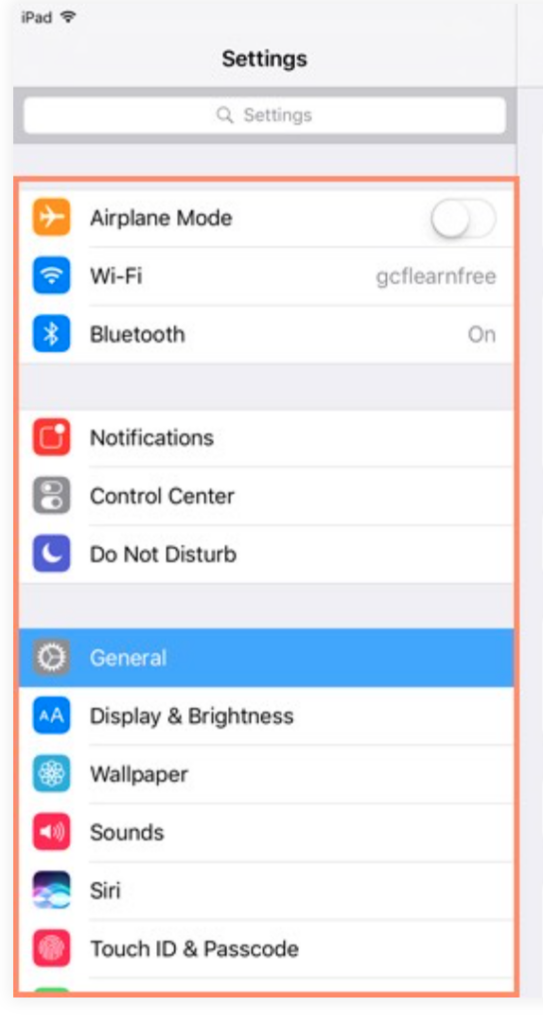
- Change how your tablet works
- Manage your Apple ID and App Store subscriptions
- Block certain content
- Monitor and control how you and/or your family use the device
- Set notifications, privacy, and password
- Turn on/off Wi-Fi
- Setting your background “wallpaper”
- Change the brightness of the screen
- and SO much more!
Accessibility Settings
The iPad has many accessibility features to support vision, physical and motor, hearing, and learning needs and preferences. Go to Settings, then find the Accessibility icon:
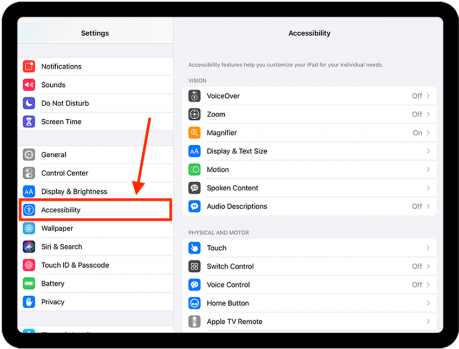
Then choose any of the following features. Specific guides and videos/links for each of these are available online on our Digital Inclusion webpage: ww.cv-atlab.org/digital-inclusion.
| Vision | Physical & Motor | Hearing |
| Voice Over | Touch | Hearing Devices |
| Zoom | Face ID & Attention | Sound Recognition |
| Magnifier | Switch Control | RTT/TYY |
| Display & Text Size | Voice Control | AudioVisual |
| Motion | Home or Top Button | Subtitles & Captioning |
| Spoken Content | Apple TV Remote | General |
| Audio Descriptions | Pointer Control | Guided Access |
| Keyboards | Siri | |
| Apple Pencil | Accessibility Shortcut |
Setting up Email

If you use an email provider like iCloud, Google, or Outlook, the Mail settings can automatically set up your email account with your email address and password:
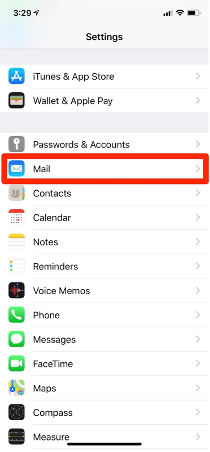
- Go to Settings > scroll down to Mail > then tap Accounts.
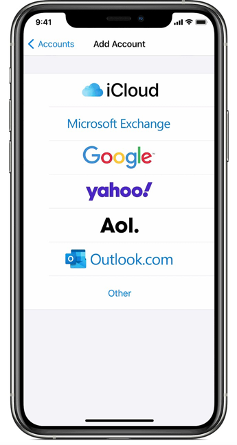
- Tap Add Account, then select your email provider. (If you don’t see your email provider, tap Other to add your account manually.)
- Enter your email address and password.
- Tap Next and wait for Mail to verify your account.
- Choose information from your email account, like Contacts or Calendars.
- Tap Save.
Setting up FaceTime
In the FaceTime app, you can make video or audio calls to friends and family. With the front camera, you can talk face-to-face. Switch to the rear camera to share what you see around you.
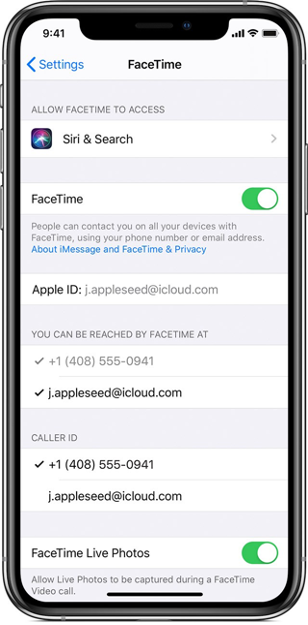
- Go to Settings
> FaceTime, then turn on FaceTime.
- If you want to be able to take Live Photos during FaceTime calls, turn on FaceTime Live Photos.
- Enter your phone number, Apple ID, or email address to use with FaceTime.
Online/Internet Safety


There are several internet browsers that you can use on the iPad. The iPad comes preloaded with Safari (blue compass icon above.) Whichever browser you like, here are 10 tips on internet safety:
- If using the internet is new to you, ask someone you trust to help you.
- Delete email offers that seem ‘too good to be true’ (phishing scams.)
- Do not share personal information online.
- Read and understand privacy settings and app privacy policies.
- Never share your passwords (keep them private/share only with people you trust).
- Think before you say something online. It could be shared with lots of people.
- If someone says something online that upsets you, tell someone you trust.
- Do not download or click links unless you know they can be trusted.
- When using public Wi-Fi (like at a coffee shop) do not enter personal or financial information on a website.
- Keep your software updated.
For more information about online safety around ‘Scams & Fraud’, visit: www.usa.gov/online-safety.
Remember, this information and more is on our Digital Inclusion webpage. You can view it herecv-atlab.org/Digital-Inclusion
iPad Word Definitions
App: Short for “application.” The icons on your iPad’s screen each represent an “app” or program that performs a specific function, such as email, internet browsing, etc.
Apple ID: A unique username and password using your email address and a password of your choice. Required to set up your iPad and to download apps, including free apps.
Bluetooth: A wireless method for connecting tools to the iPad, such as keyboards, speakers, Apple pencil, headphones, or other accessories. Bluetooth items can be connected to your iPad in the Settings menu, then in the “Bluetooth” tab.
Headphone Jack: A small, circular opening at the upper-left edge of the iPad where a headphone cord connects to the iPad.
Home Button: A circular, dime-sized button at the bottom center of the iPad’s face that is used to click out of the screen you are in and return to “home” – the page where your apps are laid out. It can also be clicked once to ‘wake up’ the iPad when the screen is off or ‘asleep’. The home button is also where you will place your finger when you use Touch ID to unlock your iPad.
Internet/Web Browser: A program or app that allows you to search on and use the internet/web. The most common browsers are Safari, Google Chrome, and Firefox.
iOS: The Apple Operating System for iPads and iPhones is called iOS. An operating system is the name for the software package that powers your computer or device, and often has numbers at the end which tell you which version of the system you’re using. For example, right now the most current version of iOS is iOS 14.2. You should occasionally update your operating system in the Settings menu under “General.”
Lightning Port: A small, flat opening at the bottom center edge of the iPad where the charge cord connects to the iPad. Newer Apple wired earbuds can also be connected here.
Lightning Connector: A cable used to charge the iPad or connect it to other devices such as a computer. One side is small and flat and fits into the iPad’s lightning port. The other side is a larger rectangular USB connector that fits into the charger or into a USB port on a computer or other device.
Phishing: A type of email or internet scam. A phishing scam is usually a link or attachment in an email or webpage that can steal your personal user information if clicked on. If you receive an email from someone you don’t know, or from an email list you don’t remember signing up for, be cautious. Do not click on any links or attachments that seem suspicious.
Power Button: A flat rectangular button on the upper-right edge of your iPad. This button can be used to turn your iPad on/off, by holding it down until the screen shows the power off/on screen. A single click will wake or sleep/turn off the screen of your iPad.
Siri: A program in your iPad where you can use your voice to ask questions and give directions. Siri can receive questions verbally and perform actions including opening apps, placing phone calls, dictating or reading text messages and emails, or answering questions through the internet.
Touch ID: An Apple security setting that allows you to open your iPad with your fingerprint. See setup instructions above. After you set up your iPad, you can add additional fingerprints if you would like.
Wi-Fi: (short for ‘wireless fidelity’) A service that is purchased to allow devices like iPads, smartphones, computers, and printers access to the internet and to communicate with each other when connected to the same Wi-Fi service/network. You may set up Wi-Fi in your home or you may see it at a coffee shop or large store (such as a grocery store.)
Acknowledgment and Credit to:
Apple Support online at support.apple.com. Much of the content of this iPad Orientation Guide is based on the work of Apple Support.
The City of Portland and the CARES Act Project supported through the CARES Act Local Relief Funds Ordinance, approved by the Portland City Council in response to the impact of COVID-19 on frontline communities. This fund paid for iPads, assistive technology, distribution, and training to hundreds of Portlanders. Special thanks to the COVID-19 response Digital Divide Work Group and all of their efforts.
November 2020


